This article describes the steps required to use blueprints.
Refer to the article Managing Blueprints for detailed steps on how to manage existing blueprints.
Create a Blueprint
This section provides the steps required to create a simple generic blueprint.
Prerequisites
- Composer access to the Broker UI
Configuration Steps
- Log in to the Broker UI
- Navigate to Composer > My Blueprints

- Click the Add Blueprint tile

- In the Add Blueprint screen, provide the following information
- Blueprint Name: A unique name for the Blueprint
- Provider: Select a blueprint type - this example uses the Generic type

- Click Add
- The blueprint composer is displayed
- From the Node Selector, drag and drop a Linux OS Image onto the canvas
With the VM node selected, edit the node properties as required
Click Save
Publish a Blueprint
Publishing a Blueprint makes it available for end-user consumption. Published Blueprints are presented via the Catalog in the Buttonwood Broker.
This section provides the steps required to publish a Blueprint.
Prerequisites
- Composer access to the Broker UI
Configuration Steps
- Log in to the Broker UI
- Navigate to Composer > My Blueprints

- Click on the Blueprint to be published
The Blueprint is opened in the Blueprint designer
- Click the Actions menu
Select Publish
- On the Catalog Item Details screen, select or enter the following information
- Category: The item category to publish - select Blueprints
- Environment: Select an Environment to publish to
- Description: A description for the published Blueprint

- Click Next
- On the Policies screen, review the existing effective policy
If required, modify the existing policies or click the Add another policy button to activate more policies
- Click Next
- On the Access screen, review the access permissions for the published Blueprint
If required, click the Add User button to grant additional access, or click the Remove button to remove access
- Click Next
- On the Summary screen, review the configured settings
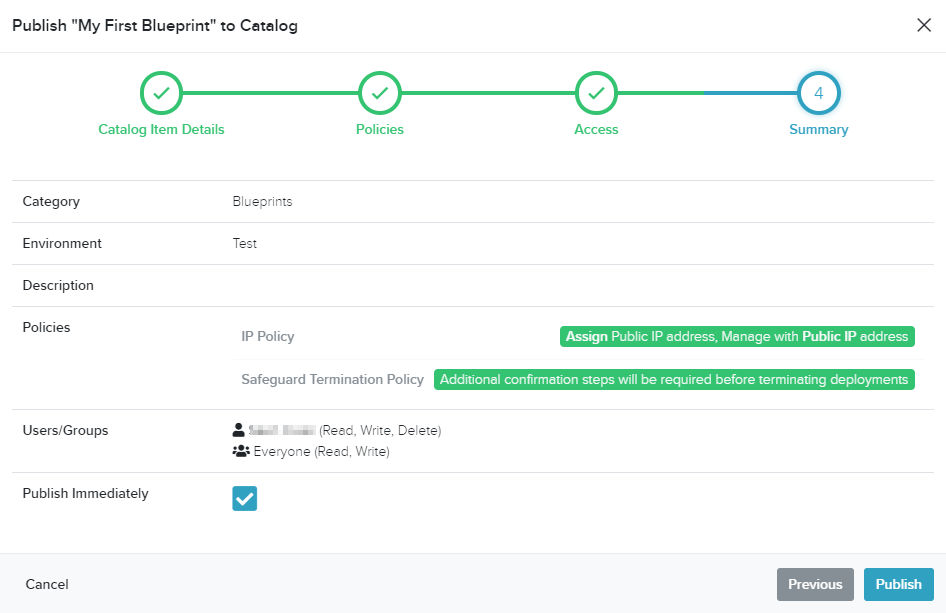
- Ensure that the Publish Immediately option is checked

- Click Publish
- The Published marker will now indicate that the Blueprint is published

Deploy a Blueprint
Deploying a Blueprint creates the workloads in a cloud service provider.
This section provides the steps required to publish a Blueprint which has been published the the Catalog.
Prerequisites
- Permissions granted to published blueprint(s)
Configuration Steps
- Log in to the Broker UI
- Navigate to Catalog

- The Catalog lists all published Blueprints which the logged in user has been granted permissions
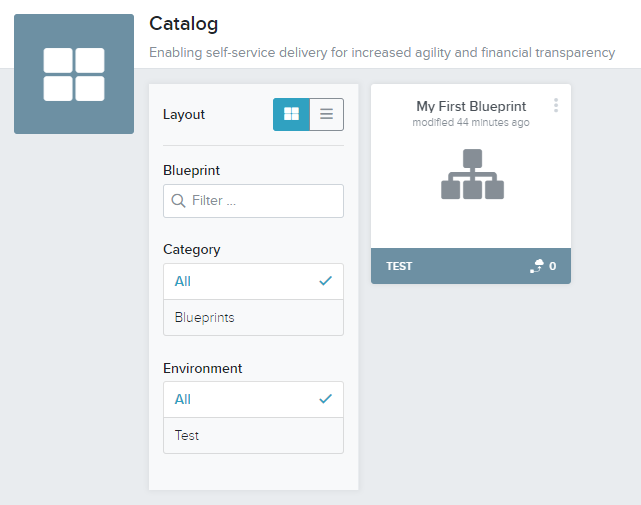
- Click on the Blueprint to deploy
- On the Deploy screen, select of enter the following information
- Name: A unique name for the deployment
- Cost Centre: The Cost Centre which this deployment will obtain its budget
- Lease End Date: The date that the deployment should be reserved to
- Description: A deployment description
- Deployment Failure Action
- Terminate all resources: All resources associated with the deployment will be deleted in the event that the deployment fails
- Do not terminate all resources: All resources associated with the deployment will remain in the event that the deployment fails - this is useful for debugging deployments, allowing manual resumption of the deployment while troubleshooting
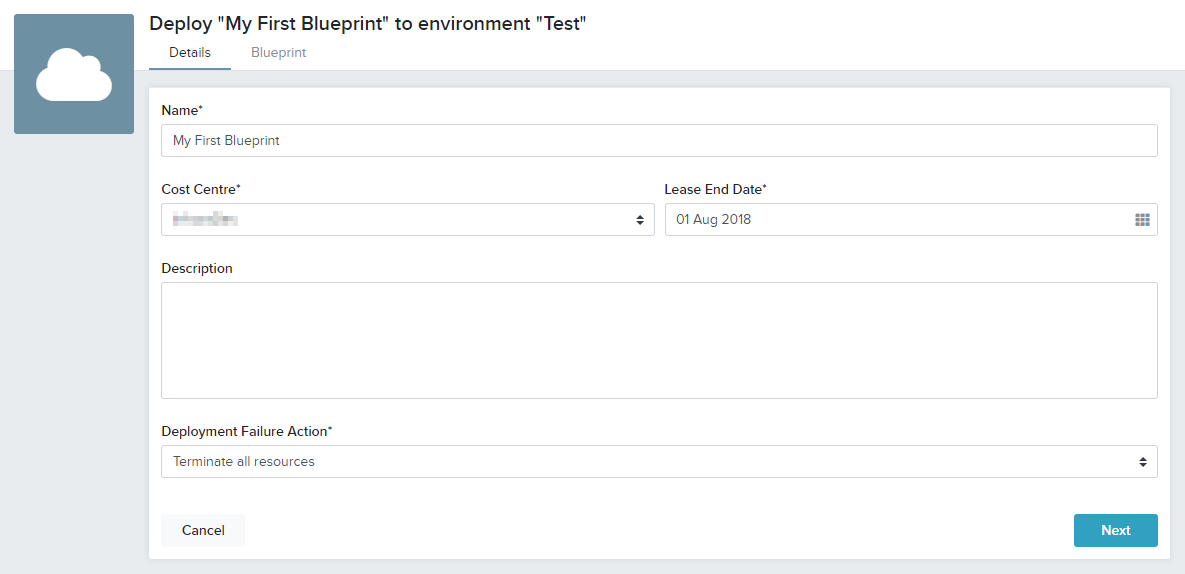
- Click Next
- The Broker determines the best location to deploy the workload depending on:
- Cost
- Configured service providers and network mappings
- Adherence to the Effective Policy
- The recommended deployment location is returned
Optionally, review resources that the Broker has determined it will deploy
Optionally, review other options for the deployment target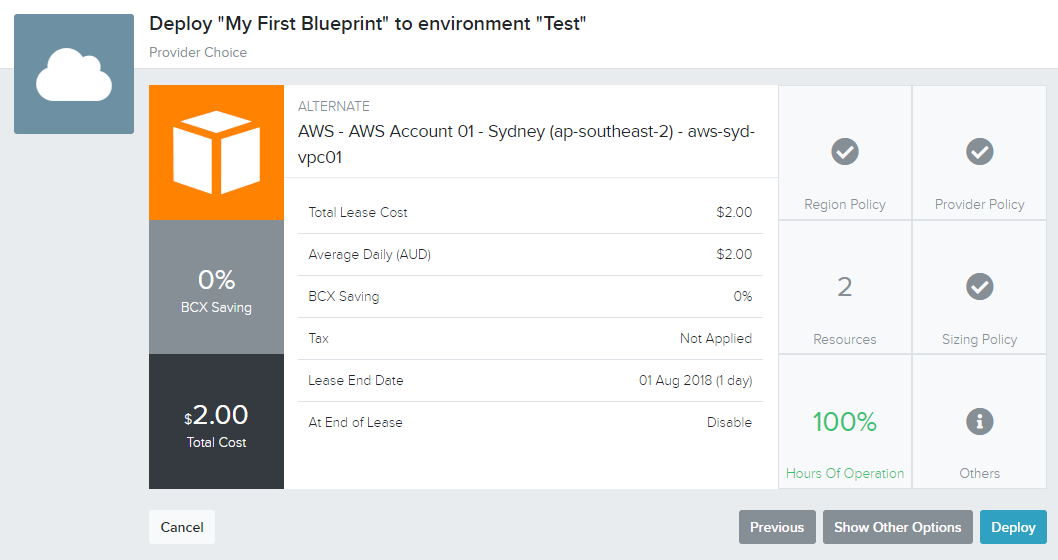
- Click Deploy
- A status message indicates that the deployment job has commenced

- Click the View Deployment button to monitor and view the deployment properties
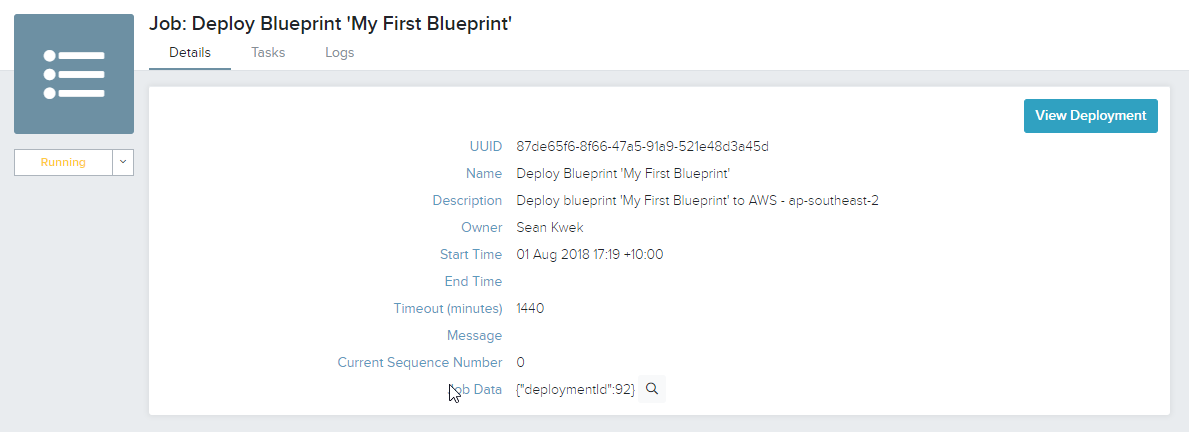
- The Deployment Details is an interactive screen allowing end users to view and drill down into the resources within the deployment as well as any associated resources.
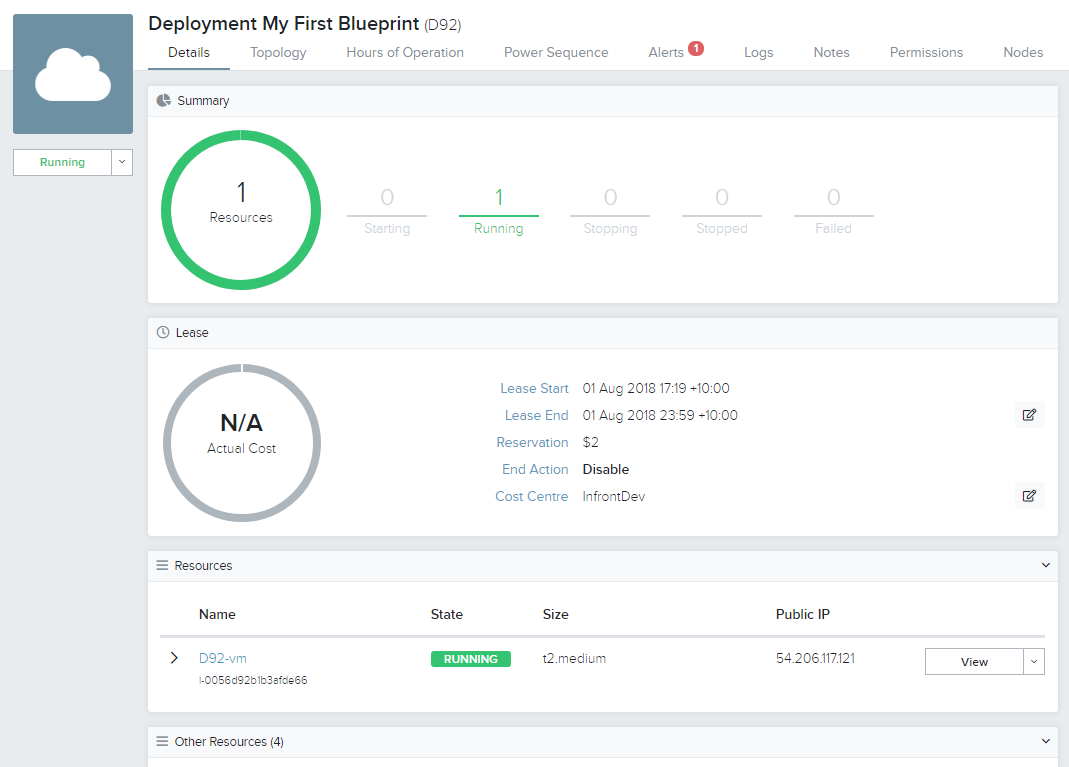
- The Blueprint has been deployed
Cloning a Blueprint
This section describes the steps required to clone a blueprint.
Cloning a blueprint creates a separate copy of the blueprint. To create a new version within the same copy, refer to the section Blueprint Versions.
- Log in to the Broker UI
- Navigate to Composer > My Blueprints

- For the blueprint to be cloned, click the ellipses menu (tile view) or the Composer drop-down menu (list view)

- Click Clone
- In the Clone Blueprint screen, provide the following information:
- To New Name: A name for the new blueprint

- To New Name: A name for the new blueprint
- Click Clone
- A message indicates the status of the request

Export/Import Blueprint Data
This section describes the steps required to export/import a blueprint.
Blueprints are exported into a JSON formatted file and saved to the local computer. Inversely, JSON formatted blueprint files can be imported from the local computer.
- Log in to the Broker UI
- Navigate to Composer > My Blueprints

- For the blueprint to be exported/imported, click the ellipses menu (tile view) or the Composer drop down list (list view)

- Click Composer
- From the Actions menu, click Export Blueprint Data or Import Blueprint Data

Removing a Blueprint
This section describes the steps required to delete a blueprint.
- Log in to the Broker UI
- Navigate to Composer > My Blueprints

- For the blueprint to be deleted, click the ellipses menu (tile view) or the Composer drop-down menu (list view)

- Click Remove
- Click Delete Blueprint

- The blueprint has been removed