In order for the Broker to create, modify, and access resources within a Microsoft Azure subscription, an Azure Active Directory (AAD) Application must be created and appropriate administrative permissions assigned. The AAD Application details are entered into the Broker plugin configuration.
This article describes the steps required to create an AAD Application with programmatic administrative access to the Azure subscription, generate access credentials, and record the following details, which are required to configure the account within the Broker:
- Subscription ID
- Directory ID
- Application ID
- Application Key
Prerequisites
- Administrative access to the Azure Portal
Configuration Steps
- Log in to the Azure Portal:
https://portal.azure.com - Navigate to Azure Active Directory

- Select Properties

- From this blade, record the Directory ID

- Select App Registrations

- Click New application registration

- On the Create screen, enter the following information
- Name: Name of the application
- Application Type: Select Webapp/API
- Sign-on URL: An arbitary URL for this application - the Broker does not use this URL

- Click Create
- A status message will confirm that the application has been successfully created

- From the app registration blade, record the Application ID

- Click Settings

- Select Keys

- On the Keys screen, enter the following information
- Description: Description for this key
- Expires: Select an expiry date
- Value: Leave blank

- Click Save

- A status message will confirm that the application access key has been successfully created

- Record the generated key value

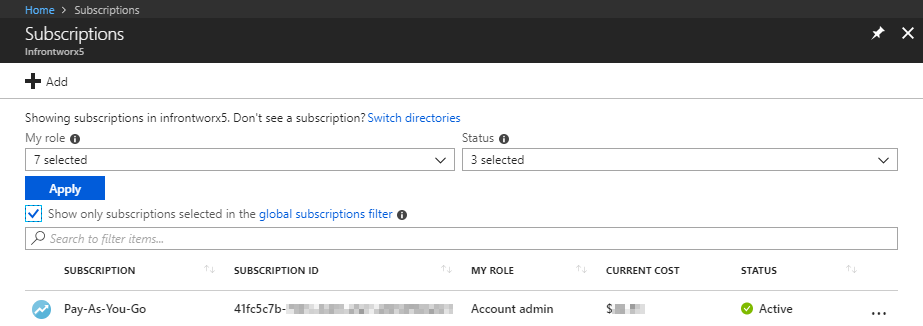
- Navigate to Subscriptions

Note: If Subscriptions doesn't appear in the services menu, it can be accessed via All Services > General - Record the Subscription ID for the subscription to configure Broker access to
Note: If no subscriptions exist, a subscription must be added in order to continue
- Select the subscription to configure Broker access to
- Select Access control (IAM)

- Click Add > Role Assignment

- On the Add role assignment screen, select or enter the following information
- Role: Select Owner
- Assign access to: Select Azure AD user, group, or service principal
- Select: Select the App registration created earlier in this article

- Click Save
- A status message will confirm that the application was successfully added to the subscription
